Showing posts with label Crafts. Show all posts

Thursday, March 10, 2016

Easter Centerpiece Craft

Since we are living in a rental house for awhile before we decide where we want to buy, we have limited how much we have unpacked.  Don't get me wrong, we aren't living out of boxes or anything like that.  We have just decided that there are some things that we'll leave boxed up for a while.

One of the things that we have stored away in boxes is all of our holiday decorations.  I imagine that we will eventually unpack the Christmas decorations if we are still in this house at Christmas time.  But the few decorations that I have for other holidays will remain boxed up.  They are like searching for a needle in a haystack.  It's not worth opening 10 boxes labeled "decorations" hoping to find those little rabbit salt and pepper shakers that I usually put out at Easter time.  (Although maybe we'll find the cord to the external hard drive that contains all of our pictures from the last three years!  But I digress!)

The other night I was looking through Pinterest for some recipe ideas and noticed that my feed was full of Easter decoration ideas.  I did try to skim over them, but let's be honest, if you've ever been on Pinterest it's pretty hard to not get sucked in.  What would it hurt to make a small Easter centerpiece for our dining room table?  My only real restriction is that we are very limited on crafting supplies on this island.  We do have a Walmart that sells craft supplies, so I decided that I needed to find something that I could possibly make using only supplies I either already had or could purchase at Walmart.

I came across this idea and figured it should be pretty easy to find all the parts. 


So off to Walmart I went.  After evaluating all of my options from their two aisles of decorations, I came up with a plan.

Using plastic eggs was an option.  Of course there were tons of plastic eggs to choose from.  Big eggs, small eggs, pastel eggs, shiny eggs, camo colored eggs, superhero eggs, if you could imagine it they probably had it.  The problem was that each kind came in a pack of 50+ eggs, and I didn't need near that many.  Then I discovered these paper mache eggs that were pretty much a blank canvas.  I used Scott's drill to drill a small hole in the bottom of each one.  Being that they are made of paper, this was pretty easy to do.

Using some paint that I already had on hand (always good to use up the supplies on hand!), I selected some pastel colors to paint them.


Each egg required two coats of paint to completely cover.  I used some BBQ skewers that we had in the kitchen to hold them while they dried.  

The pearl colors were beautiful and I loved the way they turned out.  But who can leave well enough alone?  I decided to spruce them up a little by using some glitter paints that I had.  I slightly regretted this after I did it.

Then I left them overnight to dry before putting them together in the basket.  I didn't especially like the visual of the BBQ skewers in the finished project so I picked up these fun straws to use instead.

And of course I needed a basket of some sort to put them all together.  There were basket several options.  I debated about buying an actual Easter basket, but most of them were plastic and, to be honest, more expensive then I was willing to spend for something I didn't particularly like.  I really liked this box/basket, and I think the checkered pattern ties in well with the straws.

I cut the straws to different lengths so that the eggs would be at different heights.  The straws were just a smidge wider than the holes I had drilled so I pinched them together prior to putting a dab of hot glue on the end and sticking the egg on top.  

The floral green foam that held the eggs while they were drying was cut down to fit inside the box/basket and the eggs were arranged into the foam to form a bouquet.  I tied a few pieces of ribbon around some of the straws, but I didn't really like this.  Unfortunately I had already hot glued the ribbon to the straws before I decided I didn't like it.  

To finish it off, I used some Easter basket grass to cover up the floral foam.  I carried the Easter grass over to the top of the table and added an "Easter" sign that was in my craft stash from last year.  

I'm pretty happy with the way this project turned out.  

Paper mache eggs = $1.98
Paper straws = $2.94 ($.98 per pack.  I only used four from each pack and could have just purchased one pack but I like the different color options.  I'll add the extras to my stash for another project.)
Box/basket = $1.44 (Everything is just sitting in this box so that it could be used for a different project in the future.)
Easter grass = $.38 (I used less than half of the package and could easily gather it up after the holiday to used in future project.)
Total Cost = $6.74

Monday, September 9, 2013

40 x 40 - 14. Learn How to Bind a Quilt

Over the past couple of years I have started a new crafting experience with quilting.  I love playing with the fabric.  Picking out different patterns, different textures, different colors, and then using my imagination to make them come together.

Making a quilt actually happens in four main stages.  To help explain the stages better, I will equate them to photography.

Stage 1: Selecting the pattern and the fabric = Snapping a photo with your camera (This is like looking at something raw and having to see the end product in your mind.)

Stage 2: Cutting out and sewing the top of the quilt and the back panel = Editing your photo on the computer (This is often the longest step in the process and really requires that you take your time and focus.  Sometimes you have to rip out a seam if lines don't match up.)

Stage 3: Taking the top panel, the middle filling, and the back panel and quilting them together = Getting your photos developed (Unless you have the proper equipment, you often send this stage out for someone else to do.)

Stage 4: Binding the quilt together around the outer edges = Framing your photo for display (This is putting the finishing touches on your project.)

Once you start to quilt, you start to look around you and see all of the beautiful things you can make.  When Scott, the boys, and I went to Hawaii a couple of years ago I made a point of dragging Scott to a quilt shop that I found on the Internet.  I really wanted to get fabric that I would later make into a quilt.  Not having a pattern in mind, I just bought a yard of eight different fabrics.

I decided on a pretty basic block pattern.  What I liked about the pattern was that it has black borders around each square.  This really helped with the bright mismatched Hawaiian fabric.

Here is the quilt top that I took down to be quilted.  (It's very hard to quilt on a regular sewing machine.)

Quilt 1 Edited

Once I got it back, I was ready to try my hand at binding.  I picked one of the eight fabrics that I the most left of.  I cut the fabric into several strips and then sewed those strips together.    Once I had a strip long enough to go completely around the outside of the quilt, I pinned it to the quilt front and headed to my sewing machine.

Quilt 2 Edited

Here you can see the quilt top with the binding pinned to it.  You can also see the white inner fill and a little bit of the backing piece.  Once the binding piece is sewed completely on, these extra edges are cut off so that I can wrap the binding around to the back and hand sew the rest of it.

Quilt 3 Edited

Here is my husband being crafty with his camera angles.

Quilt 4 Edited

In this photo you can see the quilting thread pattern and the binding sewed on to the front.

Quilt 5 Edited

Then it was time to head to the couch to finish with the hand sewing part.  You can stitch this part on by machine, but I wanted to be somewhat of a traditionalist and sew it by hand.

Quilt 6 Edted

Folding over the binding piece from front to back, I would take my needle and catch the binding and the back piece, sewing them together.

Quilt 7 Edited

And finally, the finished product.

Quilt 8 Edited

This quilt taught me one very important lesson in paying close attention to the pattern shapes and the direction of the fabric.  Some of the fabrics had patterns that went in one specific direction.  Not thinking about this, I had to recut some of the squares because I cut them in the wrong direction.  I could have used them if I needed to, but because I had enough fabric I fixed this.

Quilt 8 Edited 2

I currently have two baby quilts at the quilter and one ready to drop off when I pick those up.  One of my favorite parts of binding a quilt is that I can make a cup of tea, put on a Hallmark Channel movie, and sit on the couch with the quilt on my lap without feeling like I should be doing something.
Yeah, I think this quilting thing might stick around for a while.

Tuesday, August 27, 2013

40 x 40 - 21. Enter the Klamath County Fair

I am embarrassed that it has been almost nine months since my last post.  I could make so many excuses for why, but you don't want to really hear them.  So we'll begin again like we never took a break. Hopefully the next few posts will help explain what we have been up to.

Let's start with crossing a few more items off the 40 x 40 list.  Scott and I have been diligently chipping away at the list, and we have a lot to report.

Thanks to the lessons from the canning master (i.e. my mother-in-law), I felt confident enough to can a few items on my own.  Of course my husband is going to eat just about anything that I put in front of him.  So why not get an impartial judge to tell me how I did.

The Klamath County Fair is not the largest fair around, or the only fair that we can enter, but I have never participated.  At a cost of $1.00 per entry, I figured it would be worth the investment.  

I had to drop off my items on Monday and then wait until the fair opened on Thursday to find out the results.  Even though it's all in fun, the anticipation of finding out how I ranked was exciting.  And even though I knew there were elephant ears within range, we immediately headed for the exhibition room.  After scouring the room, we found my three entries…..

Klamath County Fair  7Edited

Yes, these had been opened and tasted.  I do admit that I think my salsa needs a little more "kick".  That's one I will be working on.

Next up…..

Klamath County Fair  3edited

This was the same recipe that Patty taught me to can with.  What we made in Ontario got divided up among the family and didn't last long.  I figured it was a safe bet to make more.

And finally…..

Klamath County Fair  4Edited

This recipe came from Patty.  I remember year's ago when I tasted her Apply Chutney.  I knew from the moment I decided I wanted to can, this was the recipe I wanted to make.

Like I said, even though it's all in fun, I couldn't help but be a little excited!

Klamath County Fair  2Edited

Oh, and I won a total of $9.00.  Not bad for a $3.00 investment!

Sunday, June 3, 2012

A Memorial Day Project

I keep telling myself that if I had a comfortable chair, I would spend more time outside reading a good book, then inside watching summer reruns on TV.  For a while, I have been wanting to get an Adirondack chair for our front porch.  We don't have many options in our town for shopping for one of these.  I found this one online at Cost Plus World Market:

Cost Plus Chair

I think it's what I want, but not seeing it in person makes me a little hesitant.  The nearest Cost Plus is three hours away, which means that if I wanted it anytime soon, I would have to order it online, pay extra for shipping, and cross my fingers that it's perfect.   The chair itself is $99.00, not including shipping.

On Saturday of the three-day Memorial weekend, I made it a mission to find this chair.  I went to the local Fred Meyer, but they were $149.00, and still not exactly what I wanted.

My next stop was Home Depot.  Jackpot!  They had exactly what I was looking for!  But…and you knew this was coming… it was a "Do It Yourself" project.  So excited about the find, I didn't care.  Plus, I thought it would make a great weekend project.  So I picked up a few things to complete the project.

Edited IMG 3063

Then I recruited my husband to help out.  Notice the instructions he threw off to the side immediately upon opening the box.

Edited IMG 3069

He laid out all the parts, then looked at me like I knew what to do with them.

Edited IMG 3072

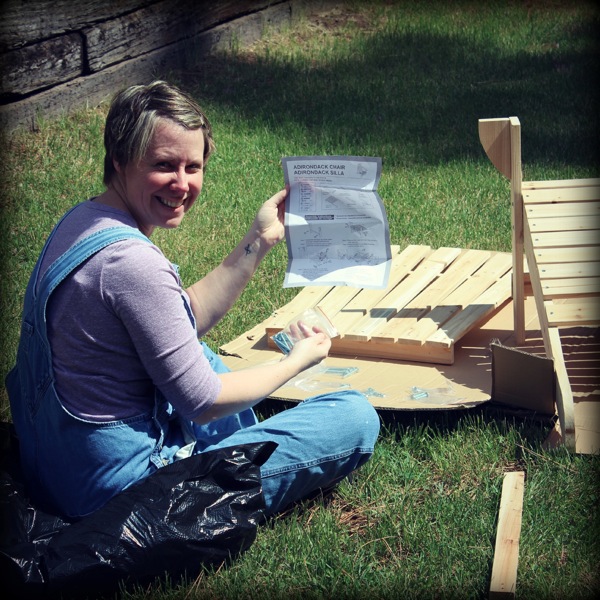
I knew exactly what to do.  I picked up the instructions, laid out all of the nuts and bolts, and started giving directions.

Edited IMG 3090

This was a pretty easy put together project, but even Mack wasn't sure about getting too close.

Edited IMG 3094

While sitting out in the yard, we were reminded of how lucky we are to enjoy the freedom and the peace of living in this country.  

Edited IMG 3101

It's pretty amazing to look up and see the jets fly over.  Something that we will never get used to.

When I looked back down, I was surprised to see that Scott had the chair almost put together.

Edited IMG 3110

The came the discussion of what I bought to paint the chair with.  The lady at Home Depot not only talked me into spray paint, but she assured me that one can would do.  My husband assured me that one can would not be enough, and then asked where the cans of primer were.  Primer, what's that?  Insert second trip to Home Depot here.  Primer and more spray paint later we were back.

Ahhh another step in the project to add start with primer, but I still had full faith that this project would be completed by the end of the day.

Edited IMG 3150

Daisy and I patiently waited for the primer to set.  It's true what they say, watching paint dry can be very boring.

Edited IMG 3155

First coat of Colonial Red.  Yes, I said first coat.  It would end up taking four coats by the time we were done.  Insert third trip to Home Depot here.  

Edited IMG 3189

Four coats of paint, and three days later, the project was finally done and I had my Adirondack chair!

Edited IMG 3205

Best part, for the same price as one of the Cost Plus chairs, we were able to do two chairs!!!

Edited IMG 3206

Plus, we can take pride in knowing we put them together and finished them ourselves.  That's what I kept telling myself after every coat of paint.

Edited IMG 3208

Sunday, April 8, 2012

Recycling - A Great Craft Idea

What can you make with a stack of men’s dress shirts? 

I had this great idea for a craft project using men’s dress shirts.  I just needed some help from my dad in the dress shirt department.  For as long as I can remember, my dad has worn dress shirts to work.  Like me with shoes, he has quite the collection.  I asked him for a dozen random dress shirts that he wasn’t using anymore.  I didn’t want to give too much away and sway him with the color or pattern choices.

IMG_0483

The first thing I did was remove all the buttons.  (These may come in handy for a later craft project.)

IMG_0492

Then I cut each shirt into sections, and cut the sections into rectangles.

IMG_0496

Mix and matching the various colors and patterns, I sewed two rectangles together to make a square.

IMG_0917

Squares would be enough, but squares would be boring, so I cut the squares into triangles.

IMG_0924

Through a series of sewing these triangles together into larger triangles and then sewing those triangles together, I was back to squares.

IMG_0935

Back to squares.  We all know that squares are boring!  Using five of these squares, I sewed three strips, then two of the three strips together.

IMG_0942

The next step was to add the border around the two panels.

IMG_0954

Enough with the triangles, squares, and rectangles.  Let’s move on to something a little more fun.  Using the leftover scraps of fabric, I cut several circles in various sizes.  I then stacked these circles on top of each other.

IMG_0961

You can’t really see it very well, but the larger circles on the left are the front panel of the shirts and still include the pockets.

Mixing and matching the circles, I sewed them down a rectangle (back to the rectangles!) of white fabric.

IMG_0962

I then sewed the circle panel in between the other two finished panels.

IMG_0969

At this point, it was time to turn this project over to the experts.  I took the quilt top and the backing fabric down to Heart to Heart quilters in Merrill, waited 33 days, and then went back and picked up a finished project.

I love the quilting pattern on the finished quilt. 

IMG_1460

But most of all, I love that I have a quilt made out of something that belonged to my dad.

IMG_1466

Tuesday, November 8, 2011

Winter = Crafting

I love this time of year.  It really makes me want to start crafting.  After a long summer of feeling like I should be outside doing something constructive, late fall and winter are a time to spend time inside working on projects that have been put off for too long.

It’s also a time to try out new craft project ideas for gifts.  I found a new website, www.pinterest.com, that has tons of wonderful ideas for DIY crafts.  Below is one that I found last week that I thought was worth a try.

Here are the ingredients:

IMG_5563

A blank painter’s canvas, a piece of fabric, a staple gun, clear contact paper, a cricut machine, and black spray paint.

Start with the blank canvas.  I chose a 12 x 12 frame.  It was a good size to start with.

IMG_5565

Select a piece of fabric cut large enough to cover the canvas. Quilter’s fat quarters work perfectly for this size canvas.  They are pre-cut and definitely make it easier than having to wait in line to get fabric cut.

IMG_5568

Using the staple gun, cover the canvas tight with the fabric.

IMG_5571

Now find a quote or saying that you like.  Due to the size of the canvas, it was important to find a short quote or saying in order for it to fit.  Using the cricut and the clear contact paper, cut out the letters and any other shapes.  Lay the letters and shapes out on the canvas to insure the fit.

IMG_5573

Once the layout is to your liking, peel off the back of the contact paper and stick the letters and shapes directly onto the fabric.

In a well ventilated area (per the instructions on the can) lay the signs out and give them a coat of the black spray paint.

IMG_5576

I found that it took two coats of paint.  I did not want to overdo it on the first coat and soak the fabric so I did two lighter layers, letting the signs dry for about 45 minutes in between the layers.  I also brought them inside for about 24 hours before the final step.

After everything is dry, peel the letters off the fabric.  I quickly learned that the contact paper letters tended to flake the paint off while I peeled. 

IMG_5601

Tada, project complete.

IMG_5607

Here are a few lessons that I learned from this project:

I used flat spray paint.  I think I would try a shiny finish next time.

Make sure that the letters and shapes are firmly pressed to the fabric to keep overspray from going under the letters.

This project took longer than I anticipated.  It was four days from start to finish with making seven signs at once.  I took about an hour and a half per sign to cover the sign, cut out the saying, and adhere the letters to the fabric.  It definitely was worth waiting the 24 hours to confirm that everything was dry before peeling the letters off.  Using the sale prices at the local Michaels craft shop, each sign cost about $5.00 a piece.

Now it’s on to the next project.  Christmas cards are coming out of my ears, but you can’t see them just yet.  I don’t want to spoil the surprise for anyone.